In the dynamic world of videography, achieving smooth, professional-grade camera movements often feels like a costly endeavor. Traditional jibs and cranes are powerful tools, but their expense, bulk, and complex setup can be prohibitive for independent creators or those working in fast-paced environments. Thankfully, a versatile and more accessible solution exists: combining a monopod with a gimbal. This potent pairing empowers filmmakers to capture breathtaking jib-like shots, elevating their visual storytelling without breaking the bank or sacrificing agility.
The Power Duo: Monopod and Gimbal for Filmmaking
Individually, monopods and gimbals serve distinct but crucial roles in filmmaking. A monopod provides vertical stability, allowing you to quickly raise or lower your camera and reduce camera shake, especially with heavy lenses. Gimbals, on the other hand, are electronic stabilizers that use motors to keep your camera perfectly level and smooth across three axes, compensating for operator movement.
When these two pieces of equipment are combined, their strengths amplify. The monopod acts as an extended arm, providing the reach and pivot point, while the gimbal at its apex ensures the camera remains incredibly stable and offers fluid control over pan and tilt. This synergy creates a lightweight, portable, and surprisingly effective rig that can emulate the sweeping motions of a much larger, more expensive jib or even the smooth flight of a drone. It’s a game-changer for run-and-gun shoots, live events, and any scenario where quick setup and mobility are paramount.
Setting Up Your Gimbal-Monopod Rig
Creating your combined gimbal-monopod rig is straightforward, but precision in setup is key to achieving optimal results.
First, mount your gimbal securely to the monopod. Most gimbals and monopods feature a standard 1/4-20 or 3/8-inch screw thread for compatibility. Ensure it’s tightened firmly to prevent any wobble.
Next, and critically, balance your camera on the gimbal before attaching the gimbal to the monopod. This involves adjusting the camera’s position on all three axes (tilt, roll, and pan) until it remains level and still when the gimbal motors are off. Proper balancing is essential for the gimbal to perform efficiently, saving battery life and preventing motor strain. If you are using a zoom lens, consider balancing it at a focal length roughly in the middle of its range to account for weight shifts.
Choosing the right equipment for this setup also plays a significant role. Look for a sturdy monopod that can handle the combined weight of your camera and gimbal, especially when fully extended. Monopods with a wide base or small, retractable feet offer enhanced stability, which is invaluable when performing dynamic jib movements. As for the gimbal, ensure it can comfortably carry your camera and lens combination. Some users find that lighter, more compact gimbal heads, even those originally designed for tripods, can work exceptionally well on a monopod, providing superior balance and ease of use compared to traditional ball heads.
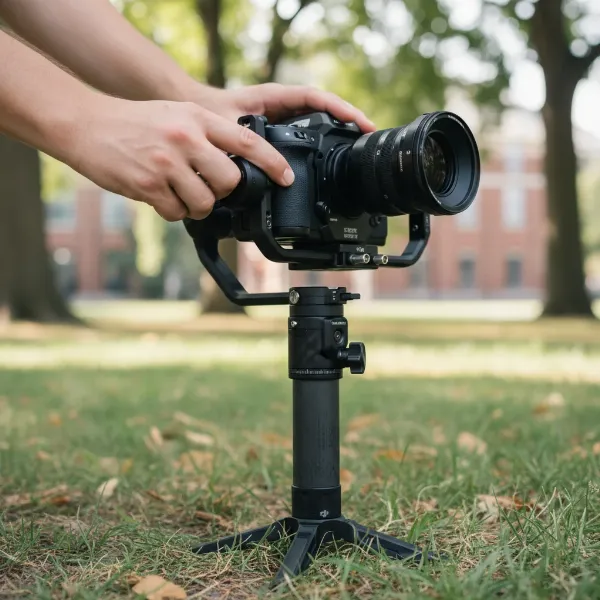 A filmmaker setting up a camera, gimbal, and monopod rig for stabilized shots.
Mastering Jib-Like Movements with Your Setup
With your rig assembled and balanced, you’re ready to explore the art of jib-like movements. The magic lies in smooth, controlled operation.
For high-to-low and low-to-high crane shots, begin with your monopod fully retracted or extended, depending on your desired starting point. As you smoothly extend or retract the monopod, simultaneously use the gimbal’s controls to adjust the camera’s tilt, keeping your subject framed consistently. The monopod acts as the crane arm, while the gimbal ensures silky-smooth vertical transitions. For truly effortless movement, bend your knees and use your body to assist with height changes, distributing the weight and maintaining a stable base.
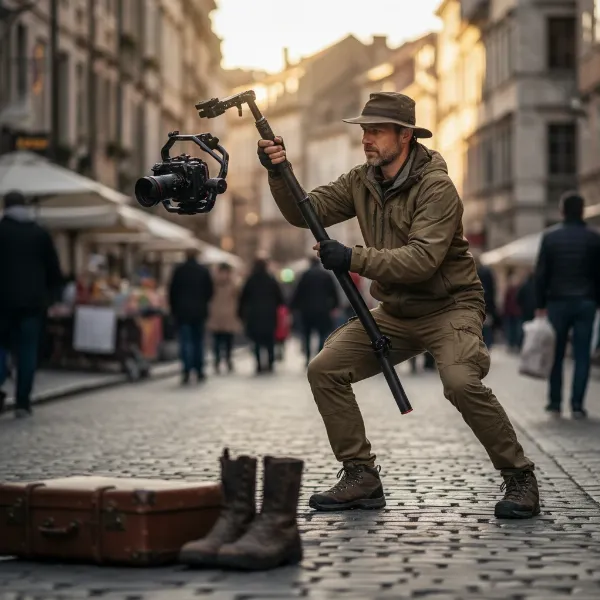 A filmmaker executing a high-to-low crane shot using a monopod and gimbal.
Achieving smooth dolly and slider shots on a budget is also possible. While a dedicated dolly provides perfect linear motion, you can simulate a similar effect. Hold the monopod-gimbal combo horizontally at chest or waist level. Then, perform a “ninja walk” – moving slowly and deliberately, heel-to-toe, to minimize body sway. The gimbal will absorb much of the remaining subtle movements, delivering surprisingly stable horizontal tracking shots. You can also pivot from your hips using a belt pouch for support, making tracking subjects easier and bearing some of the setup’s weight.
Overhead and unique perspectives are another strong suit of this combination. By fully extending the monopod and tilting the gimbal downwards, you can capture sweeping aerial-like views of a scene, introducing characters, or revealing environments from an elevated vantage point usually reserved for drones. Similarly, by positioning the monopod at unusual angles or close to the ground, you can create dynamic low-angle shots that add significant cinematic flair.
Crucial to mastering these shots is controlling the gimbal. Many gimbals offer companion apps or optional remote controls that allow you to precisely adjust pan and tilt even when the camera is out of comfortable reach. Experiment with your gimbal’s settings, such as follow speed and motor stiffness. Some filmmakers find that slightly lowering stiffness for pan and tilt can make movements more forgiving and natural, especially on a monopod. For movements where the camera needs to remain fixed on an axis while the monopod moves, consider utilizing your gimbal’s “locked off” modes.
Advanced Techniques and Creative Applications
Beyond basic jib motions, the monopod-gimbal rig opens doors to more intricate and creative shot types.
One popular application is simulating drone shots. While it won’t replace a drone for true aerials, the extended reach of the monopod combined with the gimbal’s stability can mimic low-altitude drone passes or fly-throughs. Imagine moving swiftly through a crowd or a tight space with the camera elevated, capturing a dynamic “following” shot that transitions smoothly into a sweeping reveal. This technique is particularly effective in environments where drone use is restricted or impractical.
You can also combine movements for more complex cinematic effects. For instance, execute a vertical jib shot while simultaneously performing a subtle pan to follow a subject or reveal more of the background. The key is to coordinate your physical movement with the gimbal’s controls for seamless transitions. Practicing these composite movements will significantly enhance your rig’s capabilities.
Furthermore, experiment with your gimbal’s various modes. “Pan follow” mode is excellent for horizontal sweeps while keeping the tilt locked, ideal for tracking subjects across a scene. “Follow” mode allows the camera to track both pan and tilt, providing a more organic, human-like movement. Understanding and utilizing these modes will give you precise control over your camera’s behavior during complex maneuvers.
Essential Tips for Optimal Performance
Achieving consistently smooth and cinematic results with your monopod-gimbal setup requires dedication and attention to detail.
Practice, practice, practice. Like any skill, mastering this technique requires repetition. Spend time experimenting with different movements, speeds, and angles. Review your footage critically to identify areas for improvement. The muscle memory gained from practice is invaluable for smooth operation.
Monitoring your shots is crucial, especially when the camera is elevated. Many gimbals offer wireless video transmission to a smartphone or tablet, which can be mounted to the monopod or held separately. Advanced setups might use dedicated wireless monitors or even FPV goggles for precise framing and focus, ensuring your subjects remain in shot even when the camera is high above your head.
Remember that operating a fully extended monopod with a camera and gimbal requires a degree of physical stamina and technique. Keep your knees bent, engage your core, and use smooth, deliberate motions. Developing specific body mechanics, like the “ninja walk” or controlled pivots, will significantly reduce jitters and improve overall shot quality.
Finally, proper maintenance and care will extend the life of your equipment. Keep your gimbal balanced, clean your monopod, and store your gear safely. Regularly check all screws and connections to ensure they are secure before each shoot.
Monopod-Gimbal vs. Traditional Jibs and Drones
While the monopod-gimbal combo is incredibly versatile, it’s helpful to understand its place relative to dedicated equipment.
| Feature | Monopod-Gimbal Setup | Traditional Jib/Crane | Drone |
|---|---|---|---|
| Cost | Low to Medium | High | Medium to High |
| Portability | High | Low (Bulky, Heavy) | High (Compact) |
| Setup Time | Fast | Slow (Complex rigging) | Fast (Pre-flight checks) |
| Complexity | Moderate | High (Requires crew) | Moderate (Flying skills) |
| Range/Height | Limited by monopod | Very High | Very High (Aerial) |
| Indoor Use | Excellent | Possible | Often Restricted/Impractical |
| Results | Good, jib-like | Excellent, true jib | Excellent, true aerial |
Conclusion
The marriage of a monopod and a gimbal offers an unparalleled blend of versatility, portability, and cost-effectiveness for filmmakers aiming to produce stunning, jib-like cinematic shots. It empowers creators to achieve dynamic high-to-low movements, smooth tracking, and unique overhead perspectives that were once the exclusive domain of expensive, heavy equipment. By understanding the proper setup, mastering various techniques, and committing to practice, you can unlock a new level of creative freedom in your videography. So, extend your reach, stabilize your vision, and transform your filmmaking. What incredible perspectives will you capture with this powerful combination?
Frequently Asked Questions
Can a monopod with a gimbal truly replace a professional jib?
|
Our Picks for the Best Washing Machine in 2026
As an Amazon Associate I earn from qualifying purchases.
|
||
| Num | Product | Action |
|---|---|---|
| 1 | Giantex Portable Washing Machine, 17.6lbs Compact Washer Spinner Combo with Pump Drain, Twin Tub 11lbs Wash & 6.6lbs Spin, Lavadoras Portatiles for Apartment RV Dorm College (White & Blue) |

|
| 2 | COSTWAY Portable Washing Machine, Twin Tub 26lbs Capacity Laundry Washer, 18lbs Washer and 8lbs Spinner Combo with Timer Knobs, Built-in Drain Pump, Compact Washer for Home Dorm Apartment, Blue+White |
|
| 3 | Giantex Portable Washing Machine, 21lbs Capacity, 14.4lbs Washer and 6.6Llbs Spinner, Compact for Apartment RV, White & Gray, GT-GE-10390US-GR-FP |
|
| 4 | Avanti Portable Compact Washing Machine for Clothes/Laundry, 0.84 Cu. Ft. Capacity, Standard Sink/Faucet Attachment for Apartment, Dorm, RV, White |
|
| 5 | Portable Washing Machine - Compact 2.0 Cu.ft Portable Washer, Full-Automatic Top Loader for Space Saving, Ideal for Apartments, Homes, and Dorms, 10 Wash Cycles, Low Noise, IPX4 with Drain Pump |
|
| 6 | COSTWAY Portable Washing Machine, Twin Tub 26 Lbs Capacity, 18 Lbs Washer and 8 Lbs Spinner, Compact Washer with Control Knobs, Timer Function, Drain Pump, Laundry washer for Apartment RV, Blue |
|
| 7 | COSTWAY Portable Washing Machine, Twin Tub 26lbs Capacity Laundry, 18lbs Washer and 8lbs Spinner Combo with Timer Knobs, Built-in Drain Pump, Compact Washer for Home Dorm Apartment (Grey+White) |
|
| 8 | Waterjoy Portable Washing Machines, 7.7 lbs Load Capacity Portable Washer and Dryer Combo with Built-in Barrel Light & LED Display for Household and Apartment (Blue) |
|
| 9 | Portable Washing Machine,16L Upgraded Large Capacity Portable Washer With 3 Modes Deep Cleaning.Suitable For Travel, Camping,Apartments, Dormitories, Hotels (Green) |
|
| 10 | Giantex Portable Washing Machine, 20lbs Capacity, Twin Tub 2lbs Washer & 8lbs Spinner Combo, Compact for Apartment RV Dorms, Blue & White, GT24267-PE |
|
While a monopod with a gimbal can replicate many jib-like movements with impressive smoothness and dynamic range, it won’t fully replace the precise control, extended reach, and weight capacity of a full professional jib. It’s an excellent, portable alternative for achieving similar effects on a budget.
What’s the best way to monitor my shots when the camera is high up on a monopod?
Using a smartphone app connected wirelessly to your gimbal is a common and effective method. Many gimbals have built-in Wi-Fi for this purpose. For more critical work, consider a dedicated wireless video transmitter and an external monitor for clearer viewing and more precise focus adjustments.
Is it difficult to balance a camera on a gimbal when using it with a monopod?
The balancing process for a gimbal remains the same whether it’s on a monopod or used handheld. It’s crucial to balance the camera perfectly on the gimbal before attaching it to the monopod. This ensures the gimbal motors operate efficiently and provides the smoothest possible footage.
What kind of monopod is best for this setup?
Look for a monopod that is sturdy and can support the combined weight of your camera and gimbal. A monopod with a fluid head or retractable feet at the base can offer enhanced stability and smoother movements, making it easier to achieve those desired jib-like shots.
How do I prevent jerky movements when raising or lowering the monopod?
Smoothness comes with practice. Try to move your entire body rather than just your arms, bending your knees to absorb vertical motion. Utilize slow, deliberate movements and experiment with your gimbal’s follow speed settings. Consistent tension on the monopod can also help maintain control.