In today’s competitive market, a static image simply isn’t enough to capture a buyer’s imagination. High-quality real estate video tours have become an indispensable tool, transforming property listings from flat photographs into immersive experiences. However, achieving that coveted smooth, professional look often feels like a daunting task, riddled with shaky footage and jarring transitions. This is where the magic of a gimbal comes in. This comprehensive guide will unlock the secrets to filming stunning real estate video tours using a gimbal, transforming your listings and captivating potential buyers.
Understanding the Gimbal Advantage
A gimbal is more than just a camera accessory; it’s a game-changer for videography. Essentially, a gimbal is a motorized stabilizer designed to keep your camera perfectly steady, even as you move through a property. It uses a combination of motors and sensors across three axes to counteract any unwanted movement, resulting in exceptionally smooth and professional-grade footage. For real estate videos, this stability is crucial. It allows you to create fluid walkthroughs that mimic the natural flow of someone exploring a home, highlighting its best features without distracting jitters. Beyond stability, gimbals enable dynamic shots and quick transitions, making your property tours visually compelling and truly immersive for viewers.
Pre-Production: Setting the Stage for Success
Before you even touch your camera or gimbal, meticulous pre-production is key to a successful real estate video tour. This foundational work ensures a seamless shoot and a polished final product.
Property Staging and Decluttering
Just as you would prepare a home for still photography, staging for video is paramount. A clean, decluttered, and well-organized space allows potential buyers to envision themselves living there without distractions.
- Exterior: Clear vehicles from the driveway, mow the lawn, trim hedges, wash windows, tidy outdoor furniture, and put away any maintenance tools.
- Interior: Declutter all countertops, simplify decor, organize furniture, make beds neatly, remove personal items from bathrooms, and close toilet lids. Ensure all surfaces, mirrors, and windows are spotless.
- Lights On: Turn on all lights, including lamps and under-cabinet lighting, to create a welcoming and bright atmosphere.
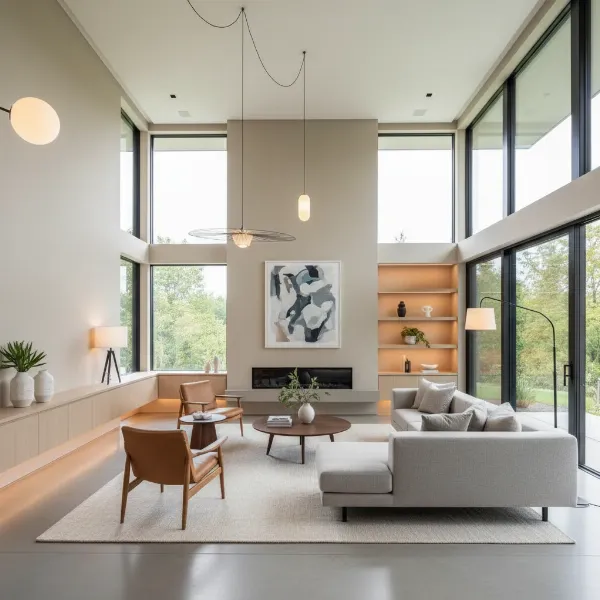 Bright, clean, and well-staged home interior with ample natural and artificial light.
Optimizing Lighting
Natural light is almost always preferred for real estate videos. It creates a warm, inviting, and true-to-life representation of the property.
- Maximize Natural Light: Open all curtains, blinds, and internal doors to allow as much light as possible to flow through the property. Mid-morning is often the best time to film, as the light is typically “cleaner” and more balanced.
- Supplement with Artificial Light: For darker rooms or on cloudy days, strategic artificial lighting can make a significant difference. Consider using LED video lights or well-placed floor lamps to brighten up spaces and ensure consistent exposure throughout the tour.
Planning Your Walkthrough and Shot List
A well-planned route ensures a logical flow and prevents disorienting jumps in your video. Think of it as guiding a viewer on a personal tour.
- Logical Route: Start at the exterior, move through the front door, explore the main living areas, kitchen, and any ground-floor bedrooms or bathrooms, then proceed to the upper levels.
- Shot List: Create a detailed list of all the rooms and specific features you want to highlight. This acts as your roadmap, ensuring every key area is covered and you maintain a consistent narrative. This plan should include not just what to shoot but also how you intend to move the camera.
Gimbal Setup and Camera Configuration
Achieving butter-smooth footage starts with proper equipment setup and optimal camera settings.
Balancing Your Gimbal: The Foundational Step
An unbalanced gimbal will work harder, drain battery faster, and produce less stable footage.
- Attach Camera and Lens: Mount your camera body with the chosen lens onto the gimbal’s quick-release plate.
- Adjust Tilt Axis: Loosen the tilt lock and adjust the camera forward or backward until it remains level when released, without tilting up or down.
- Adjust Roll Axis: Loosen the roll lock and adjust the arm until the camera remains level side-to-side.
- Adjust Pan Axis: Loosen the pan lock and adjust the entire setup until the camera doesn’t swing when you move the gimbal.
Many modern gimbals feature an auto-tune function, which can help optimize motor strength and balance for your specific camera setup.
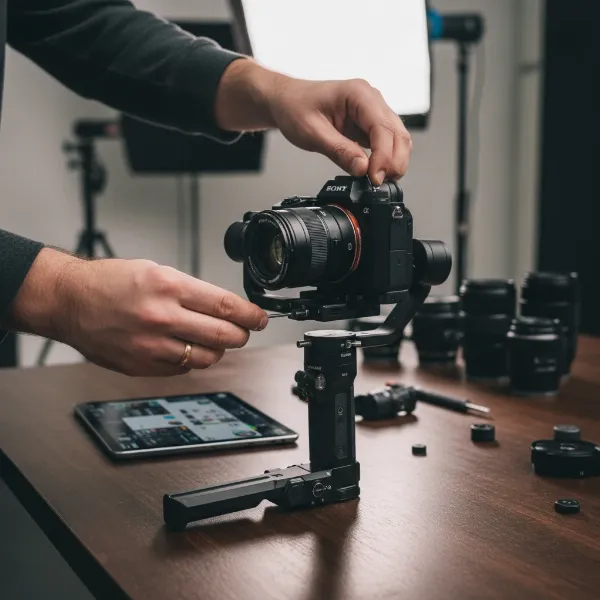 Hands adjusting a mirrorless camera on a 3-axis gimbal for proper balance.
Essential Gimbal Settings
Once balanced, fine-tuning your gimbal’s internal settings will further enhance stability and responsiveness.
- Motor Strength: Set the motor strength to match the weight of your camera and lens. Auto-tune features are highly recommended.
- Follow Speed: This dictates how quickly the gimbal reacts to your movements. For real estate, a slow to medium follow speed for both pan and tilt axes is generally recommended to achieve a smooth, cinematic feel. A slower speed for the roll axis is also beneficial.
- SmoothTrack/Smoothness: This setting controls how gradually the gimbal eases into and out of your movements. Enable SmoothTrack for pan and tilt, adjusting the “deadband” (the amount of movement before the gimbal reacts) to prevent unintentional camera shifts. A low or medium sensitivity is ideal for gradual, seamless transitions. Some gimbals might have a “smooth” setting, and a higher value (e.g., 100) can ensure a very gradual response.
- Control (Joystick Speed): If you plan to use the joystick for camera movements, a lower setting (e.g., 25 for all axes) can provide finer, smoother control.
Camera Settings for Cinematic Real Estate
Beyond the gimbal, your camera’s internal settings play an equally vital role in video quality.
- Shutter Speed: Adhere to the 180-degree rule: your shutter speed should be approximately double your frame rate. For instance, if shooting at 30 frames per second (fps), set your shutter speed to 1/60s. This produces natural motion blur without making the footage look jittery.
- Frame Rate:
- 24fps: Offers a more cinematic, film-like aesthetic.
- 30fps: Standard for real estate, providing a crisp, natural look.
- 60fps: Ideal if you intend to slow down portions of your footage in post-production for dramatic effect.
- ISO: Keep your ISO as low as possible (typically 100-400) to minimize digital noise and grain, especially in well-lit interiors.
- ND Filters: Use Neutral Density (ND) filters, particularly in bright conditions, to control exposure without increasing your shutter speed or ISO. This allows you to maintain shallow depth of field for a cinematic look even in bright sunlight.
- Lens Choice: A wide-angle lens (16mm-24mm equivalent on full-frame) is essential for real estate. It captures more of each room, enhancing the sense of space. Ensure your chosen lens minimizes distortion, especially with straight lines in tight areas like bathrooms or hallways.
- Manual Exposure: Always use manual exposure settings. Auto-exposure can cause distracting brightness shifts as you move between rooms with different lighting conditions, making editing much more challenging. Use your camera’s histogram to monitor exposure levels and avoid blown-out highlights or crushed shadows.
Mastering Gimbal Movements and Techniques
Once your equipment is ready, the art of real estate videography lies in mastering smooth, intentional camera movements.
Smooth Operator: Basic Movements
Practice fundamental gimbal movements to become familiar with its capabilities and ensure fluid execution.
- Pans: Gentle horizontal rotations to reveal connected spaces or showcase a room’s width.
- Tilts: Smooth vertical movements to highlight high ceilings, architectural details, or unique flooring.
- Tracking Shots: Moving alongside a feature (e.g., a kitchen island) to provide a dynamic perspective.
- Reveal Shots: Starting close to an object (e.g., a fireplace) and smoothly pulling back to reveal the entire scene.
The “Ninja Walk” for Seamless Transitions
The “Ninja Walk” or “Steady Cam Creep” is a crucial technique for eliminating vertical bounce when walking with a gimbal.
- Technique: Bend your knees slightly and keep your upper body and arms as still as possible. Let your legs absorb the impact of each step, moving your body smoothly as if floating. This technique ensures that your camera maintains a consistent, level height and eliminates distracting up-and-down motion.
Dynamic Shots: Playing with Height and Angles
Varying your camera’s height and angle adds visual interest and depth to your video tours.
- Vertical Movements: Use your gimbal to smoothly transition from a low angle near the floor (showing flooring, rugs) up to eye level, and then lift higher to reveal ceiling details, light fixtures, or expansive views. Utilize your gimbal’s pan-tilt-follow (PTF) mode for these seamless vertical changes without relying on manual joystick control.
- Low Angles: Start with a low shot of a room, then gradually raise the camera to reveal the entire space. This creates an inviting sense of discovery.
Doorway Transitions and Focal Points
Thoughtful transitions and clear focal points guide the viewer’s eye and maintain narrative flow.
- Doorway Transitions: Use doorways as natural transition points. Move smoothly through a doorway, allowing the camera to pan or tilt slightly to reveal the next space. This adds depth and helps viewers understand the property’s layout.
- Focal Points: Frame your shots with a clear focal point in mind—be it a window with a view, a kitchen island, or a decorative fireplace. Intentional camera movements towards and around these features draw attention to them.
Advanced Tips for Polished Video Tours
Even with perfect gimbal operation, a few extra considerations can elevate your real estate videos from good to exceptional.
Maintaining Consistency
Consistency in your video tour creates a professional and easy-to-watch experience.
- Vertical Lines: Always ensure that vertical lines (walls, doorframes) remain straight in your frame. Utilize your camera’s grid overlay to help with this. Distorted vertical lines are a common amateur mistake.
- Camera Height: Maintain a consistent camera height throughout the walkthrough portions of your video. Typically, chest height is a good starting point, mimicking a natural walking perspective.
Capturing Details and Reverse Angles
While wide shots provide context, details add character, and reverse angles offer editing flexibility.
- Highlight Details: Don’t just show rooms; highlight unique features. Zoom in smoothly on an intricate light fixture, a high-end appliance, beautiful hardwood floors, or a custom-built-in. These details add personality and value.
- Reverse Angles: As a best practice, film a reverse shot for every main shot. This provides crucial flexibility in the editing room, allowing for seamless cuts and alternative perspectives if needed.
Crafting a Compelling Narrative
The best real estate video tours tell a story, engaging viewers beyond just showing rooms.
- Short Clips: Instead of one continuous shot, film multiple short, intentional clips of each room and feature. This allows you to discard imperfect takes and stitch together only the best moments, creating a more dynamic and polished final video.
- Voiceovers: Consider adding a professional voiceover that highlights key selling points, amenities, and unique aspects of the property that might not be obvious from the visuals alone. Record this in a quiet environment separately from your filming.
- Licensed Music: Background music sets the tone and ambiance. Always use royalty-free, licensed music to avoid copyright issues. Choose tracks that complement the property’s style and evoke the desired emotion (e.g., peaceful for a suburban home, upbeat for an urban loft).
Conclusion
Mastering How To Film Real Estate Video Tours With A Gimbal is a transformative skill that will undoubtedly set your property listings apart. By embracing proper pre-production, meticulously setting up your gimbal and camera, and executing smooth, intentional movements, you can create immersive and captivating content. These cinematic walkthroughs not only showcase properties in their best light but also build trust and engagement with potential buyers, ultimately leading to faster sales and higher satisfaction. Elevate your real estate marketing today, and let your properties speak volumes through the power of professional video. What unique feature will you highlight in your next gimbal-stabilized video tour?
Frequently Asked Questions
What is the most important gimbal setting for real estate video?
Proper gimbal balancing is the absolute most critical “setting” as it forms the foundation for all smooth movements. Beyond that, a slow to medium follow speed on the pan and tilt axes is vital for cinematic, controlled movements ideal for real estate walkthroughs.
What camera lens is best for real estate video tours?
A wide-angle lens, typically in the 16mm-24mm range (full-frame equivalent), is generally considered best. It allows you to capture the full scope of a room, creating a sense of spaciousness, but be mindful of distortion with ultra-wide lenses.
How do I avoid shaky footage when walking with a gimbal?
Even with a gimbal, walking can introduce bounce. The “Ninja Walk” technique, where you bend your knees and keep your upper body still, allowing your legs to absorb movement, is highly effective for achieving consistently smooth, stable footage while moving.
Should I use auto-exposure for real estate video with a gimbal?
No, it is strongly recommended to use manual exposure settings. Auto-exposure can cause distracting fluctuations in brightness as you move from room to room or between indoor and outdoor spaces, creating an inconsistent and unprofessional look.
How long should a real estate video tour be?
Most experts agree that a real estate video tour should be concise, ideally between three to five minutes. This length is enough to showcase the property thoroughly without losing the viewer’s attention, which is crucial for retaining engagement.