Capturing buttery-smooth video footage with a gimbal is an art form, one that often hinges less on the technology itself and more on the operator’s technique. The subtle movements of your body, particularly your legs and feet, can make all the difference between jarring, shaky shots and a seamless, cinematic experience. If you’ve ever struggled with unwanted vertical bounce or horizontal sway, you’re not alone. Mastering specific walking techniques is crucial to unlocking your gimbal’s full potential, transforming raw footage into professional-grade material. This comprehensive guide delves into two primary gimbal walking techniques: the “Heel-to-Toe” or “Ninja Walk” and the “Bent Knees” approach, helping you understand their nuances, benefits, and when to employ each for truly remarkable results.
Understanding Gimbal Walking Techniques
Achieving stable footage with a gimbal goes beyond simply holding the device. Your entire body acts as a sophisticated stabilization system, working in conjunction with the gimbal’s motors to counteract unwanted motion. The goal is to eliminate the natural up-and-down oscillation of human walking, as well as any side-to-side sway, to create an illusion of the camera gliding effortlessly through space. Without proper walking techniques, even the most advanced gimbal can struggle to compensate for significant body movements, resulting in visible shakes and jitters. Think of your body as a set of springs – one set in your feet and legs, and another in your arms – that must work together to absorb the impact of each step.
Heel-to-Toe Walking: The Gliding Approach
Often referred to as the “Ninja Walk,” the heel-to-toe technique is designed to create an exceptionally fluid and gliding motion, making it a favorite for deliberate, slow-paced shots. This method minimizes vertical displacement by smoothly distributing your weight.
Advantages of Heel-to-Toe Walking
- Fluid Motion: When executed correctly, this technique can produce a remarkably smooth, floating aesthetic, as if the camera is gliding over the ground.
- Controlled Movement: It’s ideal for slow, deliberate push-in or pull-out shots, and even for smooth side-to-side tracking.
- Reduced Impact: By rolling through your foot, the impact of each step is absorbed gradually, preventing sudden jolts that can translate to your footage.
Disadvantages of Heel-to-Toe Walking
- Mastery Required: The heel-to-toe method can be challenging to perfect and may require extensive practice to achieve truly seamless results. Some even argue it can make filming harder if not done right.
- Limited Versatility: It’s generally most effective on flat, even surfaces. Uneven terrain can disrupt the smooth roll, making it less practical.
- Potential for Micro-Jitters: For side-to-side movements that involve crossing your feet, there’s a risk of introducing minor jitters if the gimbal isn’t held steadily during hip rotation.
How to Execute Heel-to-Toe Walking
To perform the heel-to-toe technique, each step begins with your heel gently touching the ground, followed by a smooth, controlled roll through the arch of your foot to your toes. Ensure that your body maintains a consistent height throughout the motion, avoiding any noticeable rising or falling. Focus on keeping your hips level to prevent vertical bounce from reaching the gimbal. Maintain a narrow stance to minimize side-to-side shifting and engage your core to provide overall stability.
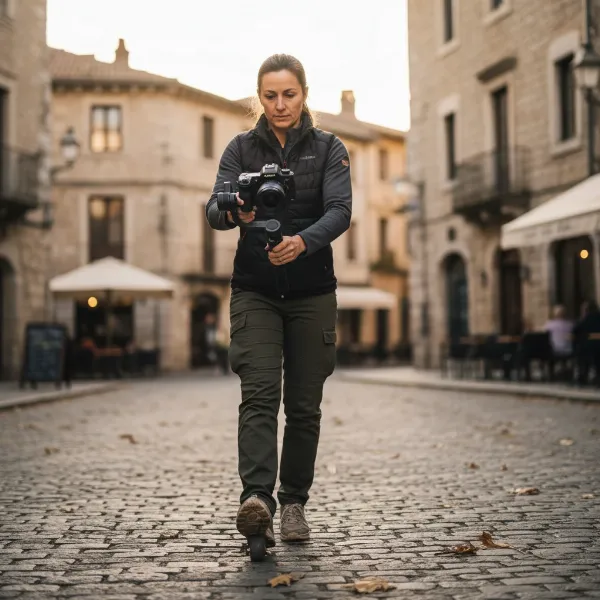 Illustration of a person performing the heel-to-toe "ninja walk" for smooth gimbal footage.
Bent Knees Walking: The Shock Absorber
The bent knees technique, while potentially more physically demanding, excels at absorbing vertical shocks and providing greater stability across varied terrains. It essentially turns your legs into dynamic shock absorbers.
Advantages of Bent Knees Walking
- Superior Shock Absorption: By keeping your knees constantly flexed, they act as natural springs, effectively dampening vertical impacts from your steps. This is particularly useful for reducing walking bounce.
- Versatility on Varied Terrain: This method is more adaptable to uneven surfaces, stairs, or slight inclines and declines, as the flexed knees can better adjust to changes in elevation.
- Enhanced Stability for Dynamic Shots: It often provides a more stable platform for faster or more dynamic movements, allowing you to maintain control while navigating the environment.
- Lower Center of Gravity: Flexing your knees naturally lowers your center of gravity, which contributes to overall stability and reduces the likelihood of camera sway.
Disadvantages of Bent Knees Walking
- Physical Demand: Maintaining a bent-knee posture for extended periods can be physically tiring, placing strain on your leg muscles.
- Potential for “Bobbing”: If not executed with precise control, inconsistent knee flexion can lead to a slight up-and-down “bobbing” motion in your footage.
- Requires Practice for Consistency: Achieving a consistent height and smooth movement while keeping knees bent requires significant practice to avoid an unnatural, stilted walk.
How to Execute Bent Knees Walking
The core principle here is to keep your knees continuously flexed, using them as the primary means of absorbing vertical movement. As you walk, ensure that your standing leg’s knee remains bent until the swing leg passes its position. Take small, controlled steps, aiming to minimize the movement of your thighs and largely restrict height changes to below the knee. Some operators even suggest tying a belt around your knees during practice to help maintain consistent flexion and small steps. Engaging your core is vital to support your upper body and maintain a steady gimbal.
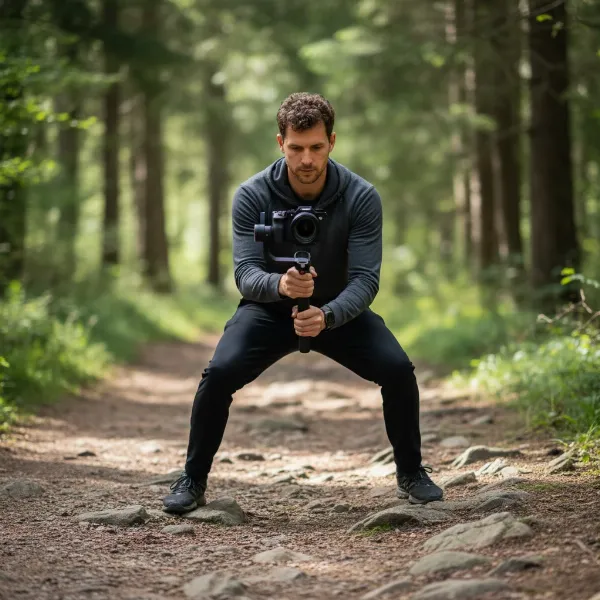 Illustration of a person performing the bent-knees walking technique for gimbal stabilization.
Choosing the Right Technique for Your Shot
Deciding between heel-to-toe and bent knees isn’t about one being inherently “better” than the other; it’s about selecting the optimal technique for the specific requirements of your shot.
Factors to Consider
- Terrain: For perfectly flat, smooth surfaces, the Heel-to-Toe technique can create an unmatched gliding effect. On uneven ground, stairs, or outdoor environments, the Bent Knees approach offers superior shock absorption.
- Speed of Movement: If your shot requires slow, deliberate tracking or smooth push-ins, Heel-to-Toe is often preferred. For faster, more dynamic movements or when needing to react quickly to a subject, Bent Knees provides more responsive stability.
- Desired Aesthetic: Do you want a truly ethereal, floating look? Go for Heel-to-Toe. Do you need a grounded, stable shot that still allows for natural movement? Bent Knees is likely the better choice.
- Physical Endurance: Consider the length of your shot and your own physical stamina. The Bent Knees technique is generally more taxing over long durations.
- Gimbal Type: While both techniques apply to most gimbals, heavier camera rigs might benefit from a more robust, full-body stabilization approach that the bent-knees method provides.
Advanced Gimbal Walking Tips
Beyond the two core walking techniques, several other practices can significantly enhance the smoothness and professionalism of your gimbal footage.
- Engage Your Core: A strong, engaged core is fundamental to all gimbal operations. It provides a stable anchor for your upper body, minimizing unwanted sway and contributing to overall balance.
- Two Hands on the Gimbal: Whenever possible, use both hands to hold the gimbal. This provides greater stability and control compared to a single-handed grip.
- Keep a Narrow Stance: Walking with your feet relatively close together helps to minimize side-to-side body sway, resulting in a more linear and stable path for the camera.
- Tilt the Gimbal Slightly Forward: Experiment with tilting your gimbal forward by about 15-25 degrees. This can engage the tilt motor more effectively, helping to dampen subtle vertical movements, especially during running or faster walks.
- Monitor Your Footage: Continuously monitor your shots in real-time. This immediate feedback allows you to identify and correct any unwanted movements, refining your technique on the fly.
- Choose Appropriate Footwear: Comfortable, supportive shoes with good grip can make a significant difference in your stability and endurance during long shooting sessions.
Comparative Analysis: Heel-to-Toe vs. Bent Knees
Understanding the direct comparison between these two prevalent gimbal walking techniques can guide your decision-making on set.
| Feature | Heel-to-Toe Walking (Ninja Walk) | Bent Knees Walking |
|---|---|---|
| Primary Goal | Create a smooth, gliding, ethereal motion, minimize horizontal sway. | Absorb vertical impacts, provide stability on uneven terrain. |
| Foot Movement | Heel touches first, rolls smoothly through to toes. | Foot plants more flatly, knees consistently flexed. |
| Knee Movement | Minimal, often slightly bent for shock absorption, extends with stride. | Constantly flexed, acting as primary shock absorbers. |
| Terrain Suitability | Best for flat, smooth, indoor surfaces. | Highly adaptable to varied, uneven, outdoor terrains. |
| Speed | Optimal for slower, deliberate, cinematic movements. | Effective for faster, more dynamic, or reactive shots. |
| Physical Demand | Moderate over short distances, can be tiring if not practiced. | Higher demand on leg muscles, can lead to fatigue. |
| Learning Curve | Requires significant practice to master and avoid unnatural look. | Requires practice for consistent height and smooth transition. |
| Common Issues | Can introduce vertical bounce if not controlled, micro-jitters with cross-steps. | Potential for “bobbing” if knees aren’t consistently bent, fatigue. |
Mastering Your Gimbal Walking: A Comprehensive Guide
Beyond just knowing the techniques, truly mastering gimbal walking involves a holistic approach to practice, equipment, and continuous learning.
Develop a Structured Practice Routine
Consistency is key. Dedicate specific time to practice each technique. Find a long, flat surface (like a brick wall) where lines can help you track unwanted movement and provide immediate visual feedback. Practice walking forward, backward, and side-to-side, focusing on maintaining a perfectly level horizon and eliminating any vertical or horizontal shifts. Record yourself and review the footage critically.
Equipment Considerations
While technique is paramount, your equipment can also play a role.
- Gimbal Balance and Calibration: Ensure your camera is perfectly balanced on your gimbal and that the gimbal is properly calibrated before every shoot. An unbalanced gimbal will fight your movements, making smooth footage nearly impossible.
- Camera Weight and Setup: Heavier camera setups can sometimes be inherently more stable due to inertia, but also more demanding to carry. Consider the overall weight of your rig and how it impacts your ability to execute techniques for extended periods.
- Accessories: Dual handles can provide additional stability and leverage for some shots. Test different setups to find what works best for your body and shooting style.
Learning Resources and Expert Advice
Leverage the vast array of online tutorials, workshops, and communities dedicated to gimbal operation. Many experienced filmmakers share their techniques and insights, offering valuable tips that can accelerate your learning curve.
Tips for Consistently Smooth Gimbal Footage
Achieving consistently smooth footage is an ongoing process of refinement and attention to detail.
- Start and Stop Gently: Abrupt starts and stops are a common cause of shaky footage. Practice feathering your movements, gradually accelerating and decelerating into and out of shots.
- Plan Your Shots Meticulously: Before you even hit record, visualize your path, your subject’s movement, and how you will execute your walking technique. Rehearse the shot without the camera if necessary.
- Utilize Wider Lenses: Wider-angle lenses inherently make camera movements less noticeable, as they capture a broader field of view, making slight wobbles less apparent.
- Post-Stabilization as a Final Touch: While in-camera technique is primary, modern editing software offers powerful post-stabilization tools (like Catalyst Browse or GyroFlow) that can smooth out minor imperfections. However, these should be used to polish, not to fix fundamentally shaky footage.
“The true secret to buttery-smooth gimbal footage isn’t just the gear, it’s the dance between the operator and the environment, orchestrated by disciplined body mechanics.” – [Filmmaking Expert Name (Placeholder)], Professional Cinematographer
Conclusion
Mastering gimbal walking techniques, whether it’s the graceful heel-to-toe glide or the resilient bent-knees absorption, is a journey that transforms your videography. Both methods offer distinct advantages, empowering you to tackle different terrains and achieve diverse cinematic looks. Remember, the ultimate goal is to remove yourself from the shot, allowing your audience to immerse themselves in a seamless visual narrative. By diligently practicing these techniques, paying attention to your body mechanics, and integrating advanced tips, you’ll elevate your footage from good to truly exceptional. Which gimbal walking technique will you focus on perfecting first to unlock the full potential of your next film project?
Frequently Asked Questions
What is the best gimbal walking technique for beginners?
For beginners, a good starting point is to practice the core principles of both the heel-to-toe and bent-knees techniques on flat ground. Focusing on engaging your core, taking small steps, and keeping your knees slightly flexed will provide a solid foundation before specializing.
How can I reduce vertical bounce with a gimbal?
To reduce vertical bounce, concentrate on keeping your hips level (for heel-to-toe) or consistently flexing your knees to act as shock absorbers (for bent knees). Also, consider tilting your gimbal slightly forward and always practice smooth transitions.
Is heel-to-toe walking always better than bent knees?
No, neither technique is universally “better.” The optimal choice depends on the specific shooting conditions, desired shot aesthetic, and terrain. Heel-to-toe excels on flat surfaces for gliding shots, while bent knees is more versatile for absorbing impacts on uneven ground.
How do professional gimbal operators walk?
Professional gimbal operators often blend elements of both heel-to-toe and bent knees techniques, adapting fluidly to the environment and shot requirements. They prioritize constant core engagement, smooth transitions, and extensive practice to make their movements almost imperceptible.
What kind of shoes should I wear for gimbal walking?
Comfortable, flat-soled shoes with good cushioning and non-slip grip are ideal for gimbal walking. They provide stability and allow for precise foot placement, reducing fatigue and aiding in the smooth execution of techniques.